Transform your aquarium from ordinary to extraordinary with a stunning, realistic rock wall background! Forget flimsy, mass-produced backdrops; this guide empowers you to create a breathtaking, custom-designed hardscape that will enhance your aquatic environment and provide a captivating visual experience for you and your fish. Imagine the rich textures, subtle shadows, and natural beauty you can achieve, all crafted with your own hands. A truly bespoke aquarium background will elevate your tank, creating a more immersive and enriching habitat for your aquatic inhabitants.
This DIY project doesn’t require specialist skills or expensive equipment, making it accessible to hobbyists of all levels. From selecting the right materials to achieving a convincingly natural finish, we'll guide you through each stage of the process with clear instructions and helpful tips. Let’s dive in and discover how to build your own magnificent rock wall aquarium background by following our comprehensive step-by-step guide.
Preparation and Safety Guidelines
- Plywood
- Rocks
- Buff Clay
- Wooden Bamboo Skewer
- Damp Paper Towels
- Garbage Bag
- Clay Slabs
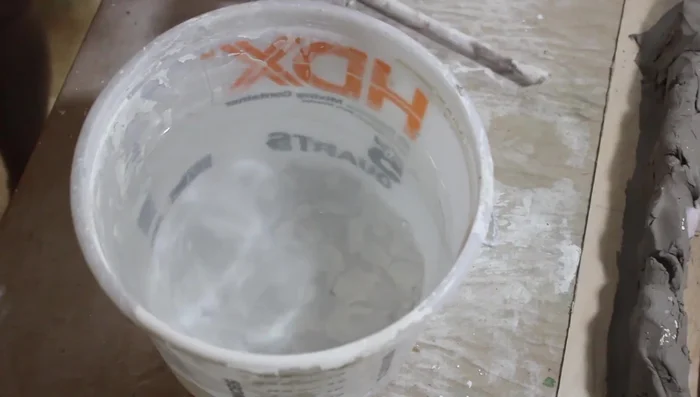
- Alginate
- Warm Water
- Spatula
- Plaster of Paris
- Bucket
- Olive Oil Cooking Spray/Petroleum Jelly
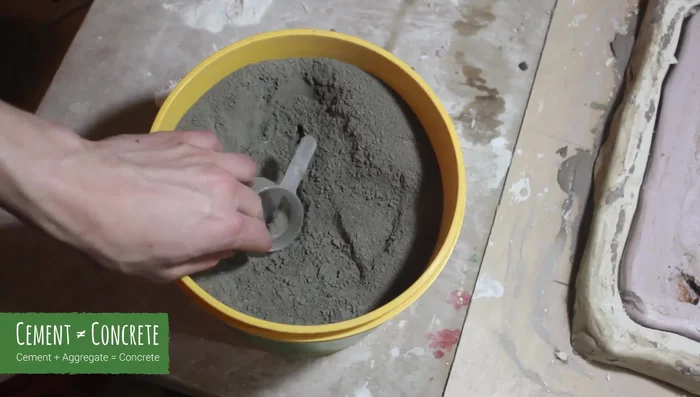
- Hydraulic Cement
- Aggregate
- Sand
- Water
- 100% Silicone
- Rubbing Alcohol
- Paper Towels
- Always cure the cement thoroughly before placing it in the aquarium. Uncured cement can leach harmful chemicals into the water, endangering your fish.
- Ensure the rock structure is completely secure and cannot collapse into the tank. Any loose rocks or unstable formations could crush or injure your fish.
- Use only aquarium-safe materials. Avoid paints, sealants, or adhesives that contain toxic substances. Thoroughly research any product before use.
Step-by-Step Instructions
Prepare the Form
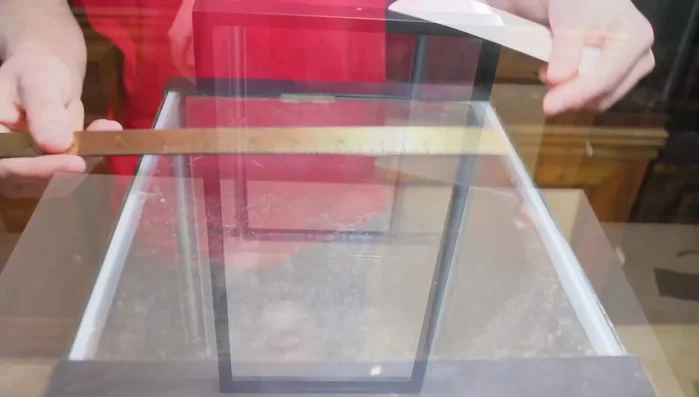
- Measure your aquarium and draw a box on plywood, slightly smaller than the actual dimensions.

Prepare the Form Create the Rock Structure
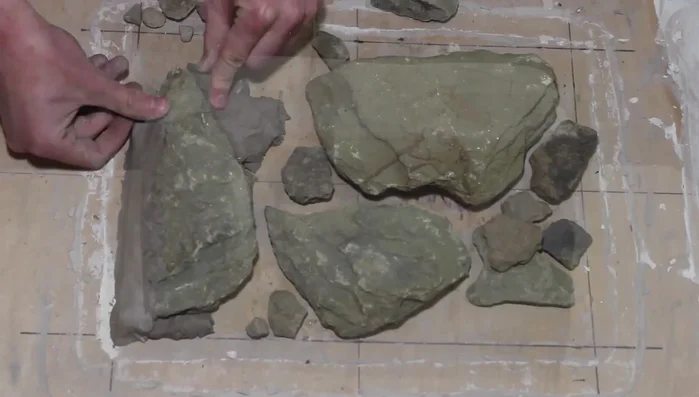
- Arrange rocks in a natural formation on the plywood, filling gaps with clay to extend rocks and create crevices. Use a tool to carve the clay for a natural look.
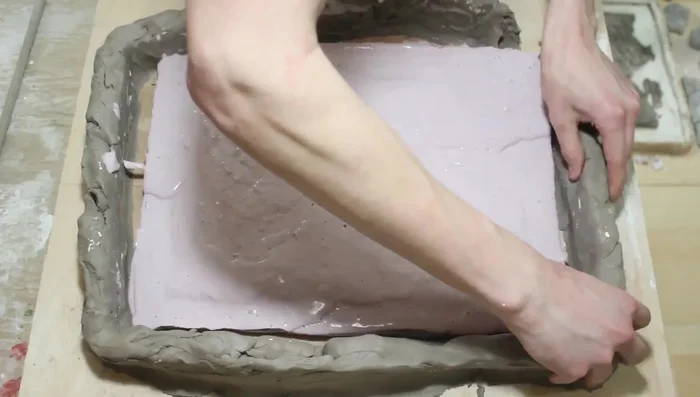
Create the Rock Structure Create the Alginate Mold
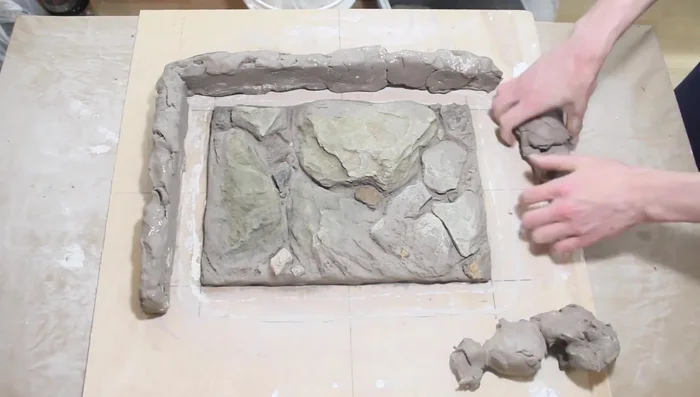
- Create a clay barrier around the rock structure, ensuring no cracks and extending it 2 inches taller than the sculpture.
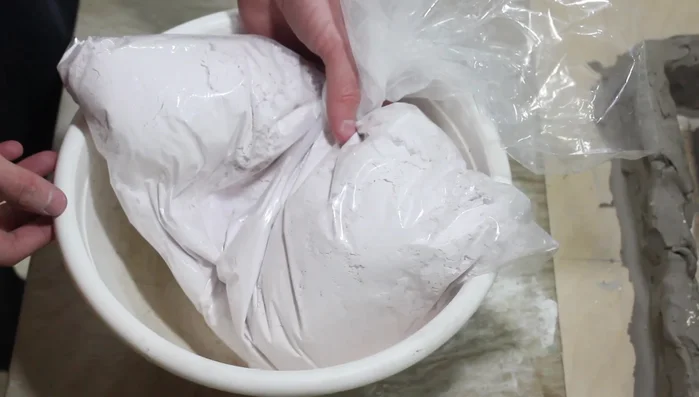
- Mix alginate (1:1 ratio with warm water) to a pancake batter consistency and pour it into the clay form. Let it set for about 10 minutes until firm.
- Optionally, create a second, larger clay barrier around the alginate mold (1 inch larger on all sides).
Create the Alginate Mold Create the Plaster Mold
- Mix plaster of Paris with warm water to a thick milkshake consistency. Pour it into the clay form (or the larger form if created) and let it set for at least 8 hours (16+ recommended).
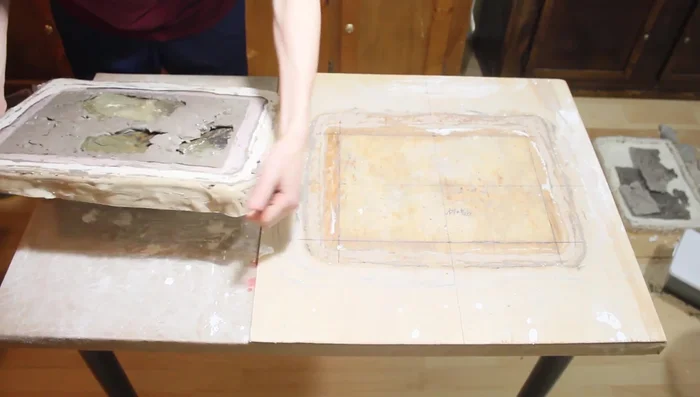
Create the Plaster Mold Remove Clay and Prepare Alginate Mold
- Remove the clay barrier. Flip the form and remove the alginate mold. Clean excess clay from the mold and place it back into the plaster mold.
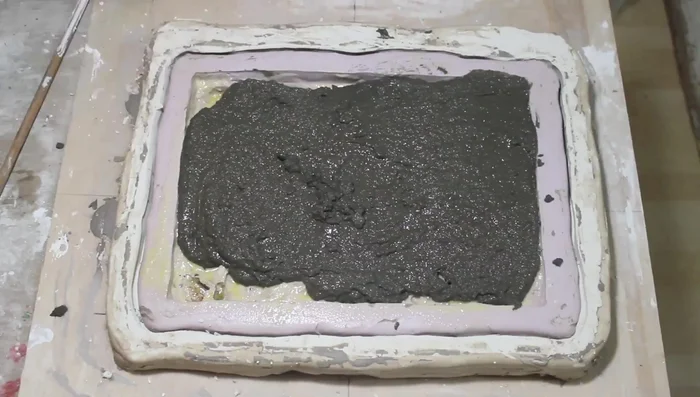
Remove Clay and Prepare Alginate Mold Create the Concrete Background
- Mix concrete (3 parts aggregate, 2 parts cement, 1 part water) to a thick milkshake consistency. Add a release agent (olive oil spray/petroleum jelly) to the alginate mold.
- Pour the concrete into the alginate mold, ensuring an even surface and removing air pockets. Let it set for at least 8 hours (18+ recommended).
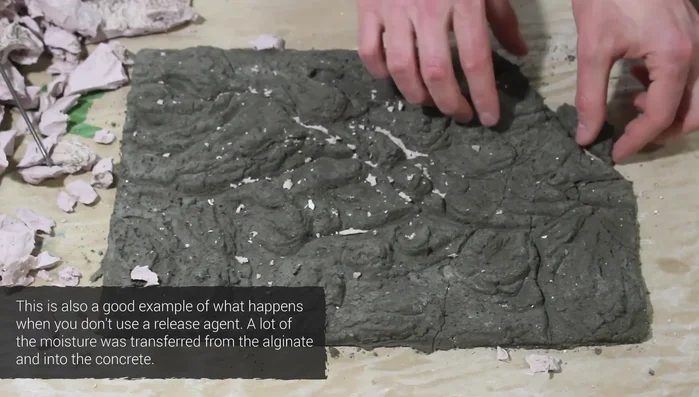
Create the Concrete Background Remove from Mold & Dry
- Remove the concrete background from the mold. Clean off any alginate residue. Let the background air dry for 3 days.
Remove from Mold & Dry Install the Background
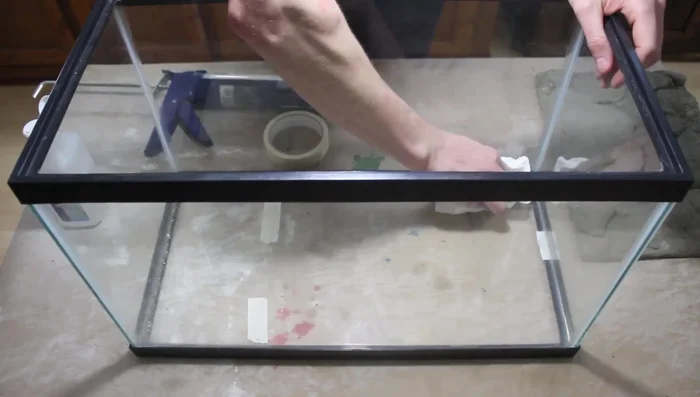
- Prepare the aquarium glass with rubbing alcohol. Apply silicone to the glass, place the background firmly onto the silicone, and let it cure for at least 24 hours.
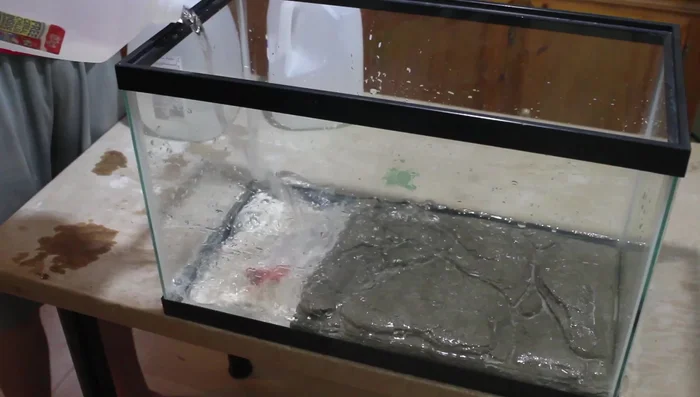
Install the Background pH Stabilization
- Rinse the concrete background multiple times to stabilize the pH, testing periodically until satisfied.
pH Stabilization
Read more: DIY 3D Aquarium Background: A Step-by-Step Guide Using Styrofoam
Tips
- Keep the rock structure thicker than 1/2 inch to prevent cracking.
- Use a thin layer of alginate to minimize material usage and improve mold creation.
- Make sure the plaster and concrete mixtures have the consistency of thick milkshakes to avoid cracks and crumbling.
- Use a release agent to easily remove the concrete from the alginate mold.
- If the background cracks, repair it and use it for a more rugged look.