Transform your plain aquarium into a captivating underwater world with a stunning, handcrafted 3D background! Forget expensive, pre-made backdrops; this guide shows you how to create a unique and personalized aquarium landscape using readily available styrofoam. The possibilities are endless – from vibrant coral reefs teeming with life to mysterious, sunken shipwrecks – all achievable with a little creativity and some simple tools. Creating a realistic and visually engaging environment for your aquatic friends not only enhances their habitat but also dramatically improves the aesthetic appeal of your aquarium.
This step-by-step guide will walk you through the entire process of designing, sculpting, and finishing your very own styrofoam 3D aquarium background, from initial sketching and material gathering to the final touches ensuring a completely safe and aesthetically pleasing environment for your fish. Let's dive in!
Preparation and Safety Guidelines
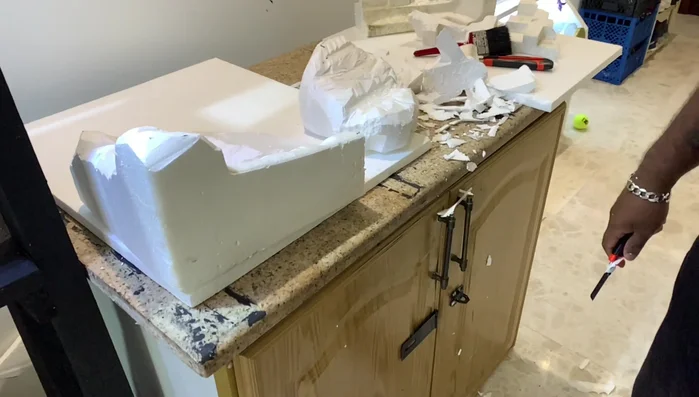
- Styrofoam (thermocol)
- Recycled materials
- Acrylic paint
- Sponge
- Silicon glue
- Always ensure the styrofoam is completely sealed and waterproofed before submerging it in the aquarium. Unsealed styrofoam will break down and contaminate the water, harming your fish.
- Use only aquarium-safe paints and sealants. Avoid using toxic materials that could leach into the water and harm aquatic life.
- Secure the background firmly to prevent it from shifting or falling, potentially injuring your fish or breaking the aquarium glass.
Step-by-Step Instructions
Planning and Measurement
- Measure your aquarium tank accurately to ensure the background fits perfectly.

Planning and Measurement Creating Artificial Rocks
- Create artificial rocks using recycled materials and styrofoam. Shape and arrange them to your liking, remembering it doesn't need to be overly complex.
Creating Artificial Rocks Painting and Drying Rocks
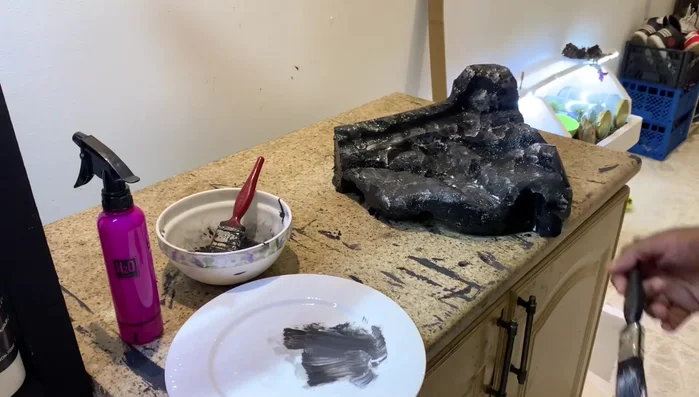
- Paint the artificial rocks using acrylic paint. Allow them to dry completely for 24 hours.
Painting and Drying Rocks Adding Shading to Rocks
- Add shading to the rocks using an old sponge and acrylic paint to achieve a more natural look.
Adding Shading to Rocks Assembling the Background
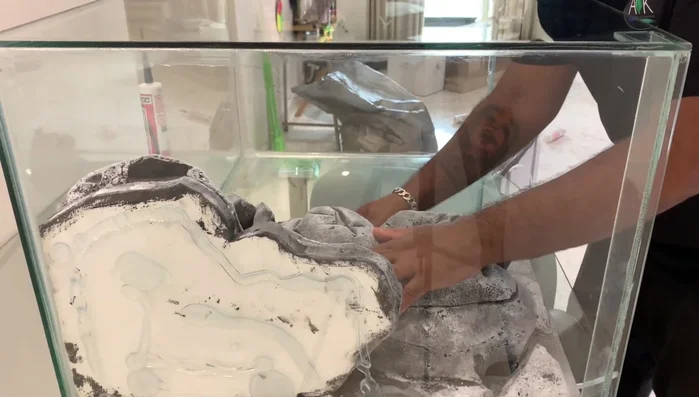
- Apply a layer of silicone glue to the styrofoam board, attach the artificial rocks securely. Allow the silicone to fully dry for 24 hours.
Assembling the Background Installing the Background
- Install the 3D background into the aquarium tank using a generous amount of silicone to prevent it from floating.
Installing the Background


Read more: DIY Realistic Rock Wall Aquarium Background: A Step-by-Step Guide
Tips
- Take accurate measurements of your aquarium to avoid size discrepancies.
- Don't overthink the design; focus on achieving a visually appealing outcome.
- Allow 24 hours drying time for both paint and silicone to achieve best results.
- Use plenty of silicone to ensure the background adheres securely to the tank, especially given the styrofoam's tendency to float.