Transform your bland aquarium into a captivating underwater paradise without breaking the bank! Creating a stunning 3D background for your fish tank can seem daunting, but with this easy DIY tutorial, you'll discover it's surprisingly simple and affordable. Forget expensive, pre-made backdrops; we'll guide you through crafting a unique and realistic landscape using readily available materials, adding depth and visual interest to your aquarium. This project is perfect for beginners and seasoned aquascapers alike, offering a fantastic way to personalize your aquatic environment and unleash your creativity.
This budget-friendly approach uses common household items and readily sourced materials, minimizing cost and maximizing impact. We'll explore different techniques and design options, helping you to create a background that perfectly complements your fish and plants. Ready to dive in and create your own masterpiece? Let's get started with the step-by-step instructions below.
Preparation and Safety Guidelines
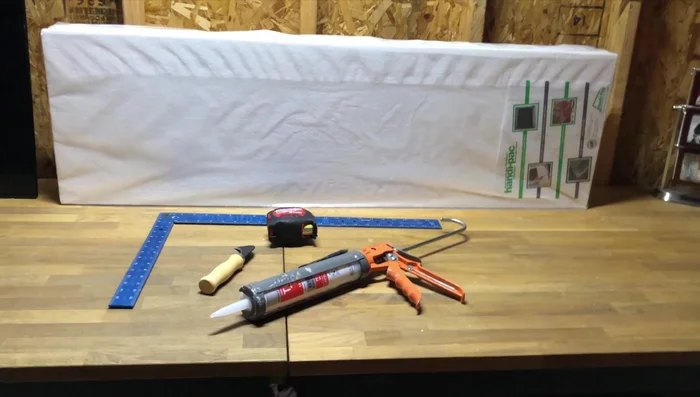
- Styrofoam
- Silicone gun
- Concrete mix
- Tape measure
- Knife
- Paintbrush
- Always ensure the background is completely sealed and waterproof before placing it in the aquarium. Any gaps or porous areas can harbor bacteria and compromise water quality.
- Use only aquarium-safe materials. Avoid any paints, glues, or foams that contain toxic chemicals which could leach into the water and harm your fish or plants.
- Secure the background firmly to prevent it from detaching and potentially injuring your fish or causing damage to your aquarium.
Step-by-Step Instructions
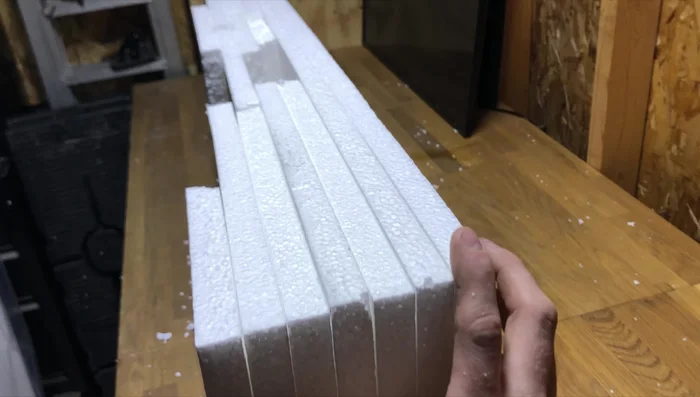
Prepare the Styrofoam Base
- Measure and cut styrofoam to fit your aquarium's interior dimensions, subtracting a half-inch for a tight fit. Account for center braces if necessary by cutting the background into sections.

Prepare the Styrofoam Base Assemble and Cure the Styrofoam
- Assemble the styrofoam pieces using silicone, ensuring a strong bond. Let it dry for approximately 24 hours to ensure complete curing.
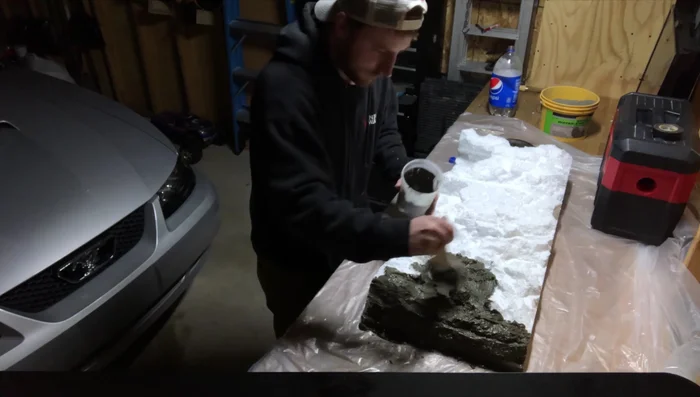
Carve the Styrofoam Design
- Carve out desired shapes and features into the styrofoam background. This step allows for creating caves, rock formations, or other creative designs. Don't worry about being perfect; the concrete mix will help refine the look.
Carve the Styrofoam Design Apply and Cure the Concrete Mix
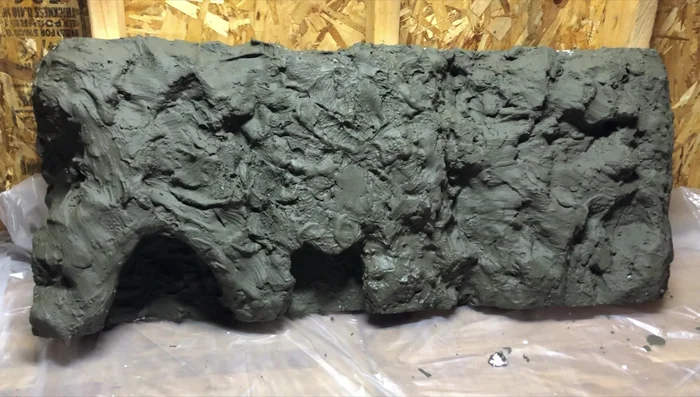
- Apply the concrete mix in small portions using a paintbrush. Ensure complete coverage and fill in any cracks. Multiple thin layers are recommended for a more detailed and natural appearance.
- Allow the concrete mix to cure completely (24 hours). Once cured, the background will be extremely hard and durable, suitable for submersion in the aquarium.
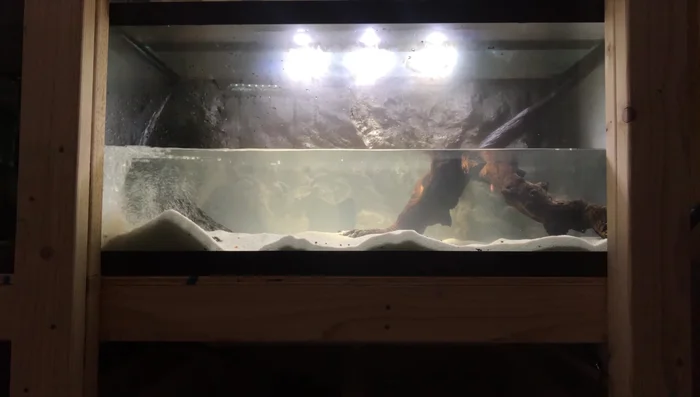
Apply and Cure the Concrete Mix Install and Finish
- Secure the background inside the aquarium using silicone. Let it cure for 24 hours before filling the tank. Perform a few large water changes afterwards to stabilize pH levels.
Install and Finish
Read more: DIY 3D Aquarium Background: A Step-by-Step Guide Using Styrofoam
Tips
- Mix concrete in small batches to prevent hardening.
- Multiple styrofoam layers create a more textured look, while a single layer is simpler and faster.
- Monitor pH levels after adding the background and perform water changes to maintain a stable environment for your fish.