Embark on your saltwater aquarium journey with confidence using this comprehensive 30-step guide. Designed for beginners, this guide breaks down the process of setting up a thriving saltwater tank into manageable steps, from budgeting and location selection to cycling and introducing your first fish. We'll cover essential equipment, crucial maintenance tasks, and offer tips for ensuring a healthy and vibrant underwater ecosystem. Learn how to avoid common pitfalls and create a stunning saltwater aquarium that you'll be proud to showcase.This step-by-step guide provides a clear roadmap, addressing everything from initial planning and purchasing decisions to the intricacies of tank cycling and fish acclimation. We'll help you navigate the world of live rock, filtration, and water parameters, ensuring your success in this rewarding hobby. Whether you're a complete novice or have some experience, this guide will equip you with the knowledge and confidence to build a beautiful and thriving saltwater aquarium.
Pros And Cons
- Provides a step-by-step guide for setting up a saltwater aquarium.
- Offers four different budget options to choose from.
- Includes detailed instructions and build lists.
Read more: Top 5 Green Aquarium Corals
Choosing Your Budget and Purchasing Essential Items
Starting a saltwater aquarium can seem daunting, but it's achievable with careful planning. The first step is to determine your budget. Different budget levels offer various equipment options, allowing you to customize your setup based on your financial constraints.

Once you've selected your budget, purchase the necessary items. Each budget level includes essential, optional, and upgradeable components. Prioritize the essentials first, and then gradually incorporate optional and upgradeable items as your budget allows. Ensure all components are compatible within your chosen budget tier.
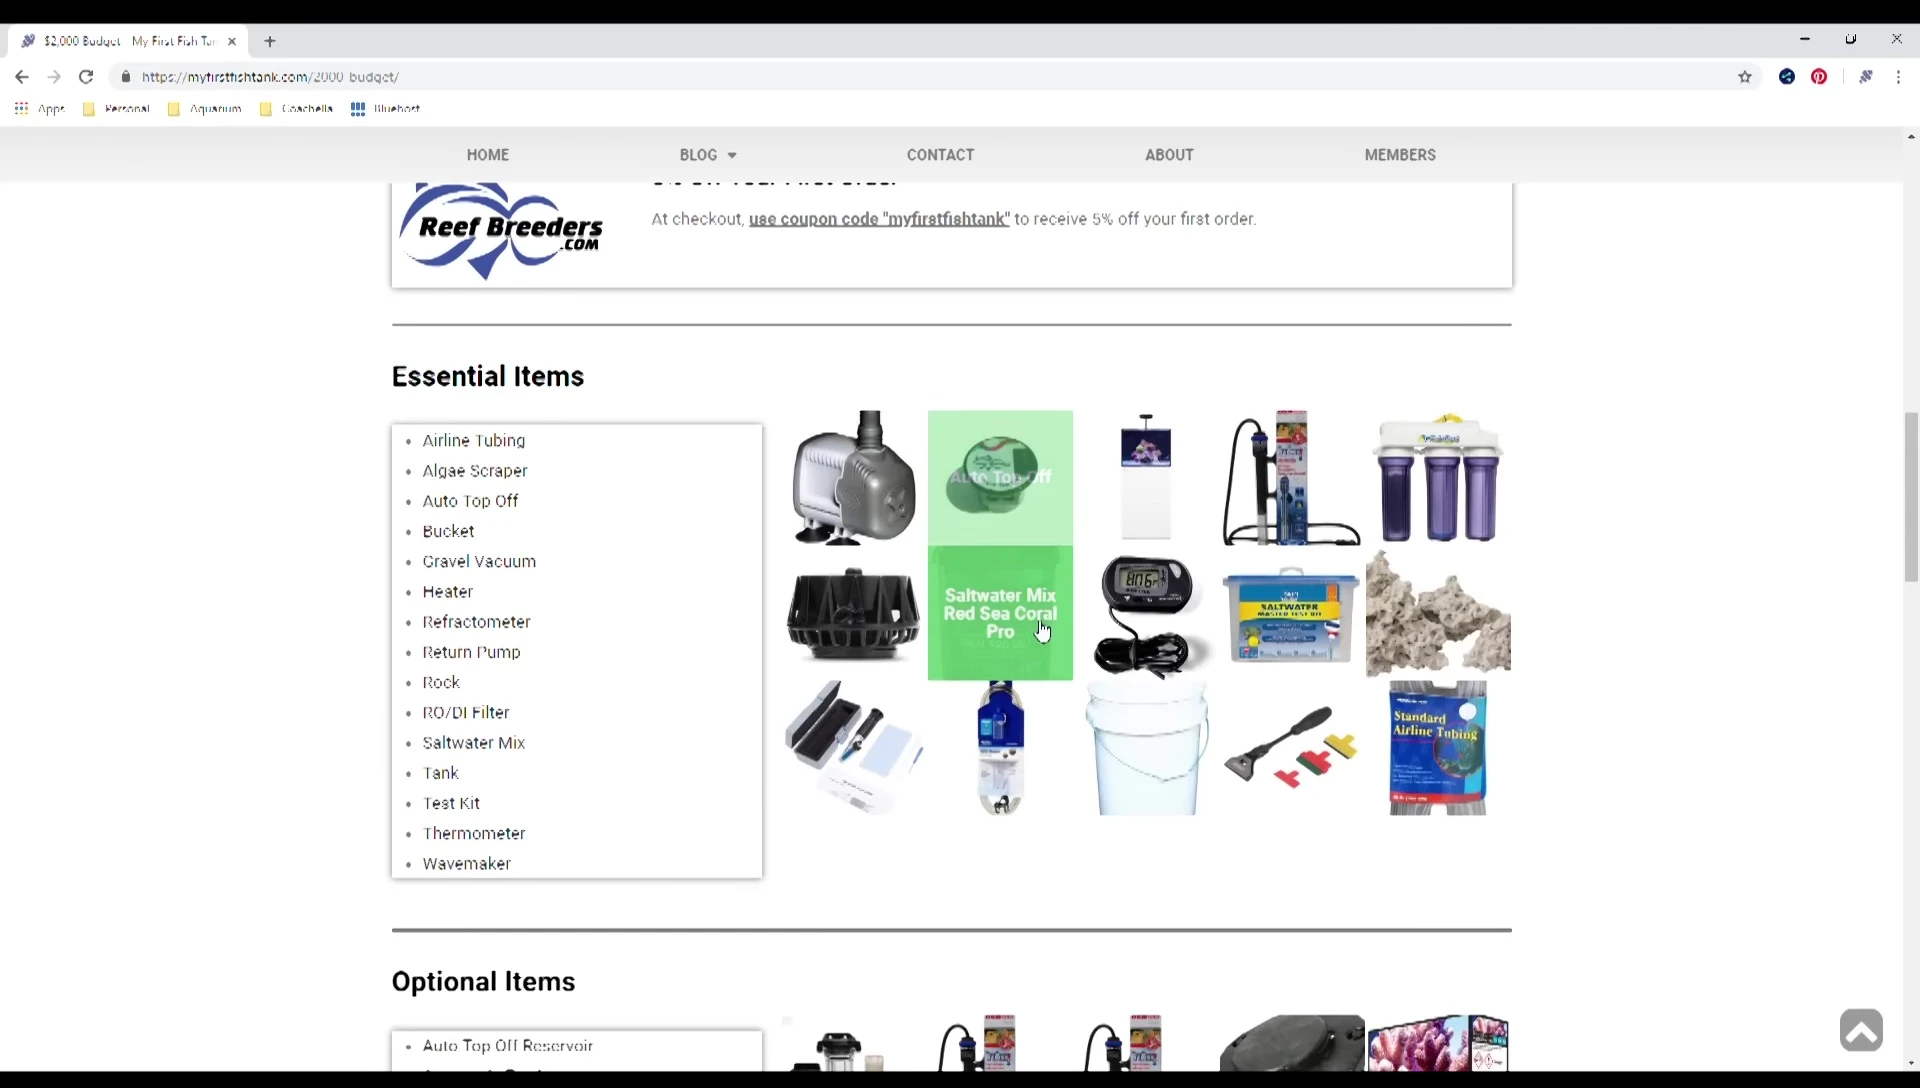
Consider purchasing items from multiple online retailers to secure the best prices. This strategic approach ensures you obtain high-quality products without breaking the bank. If you live outside the USA or Canada, contact the creators for assistance in finding suitable local retailers.

Tank Location and Preparation
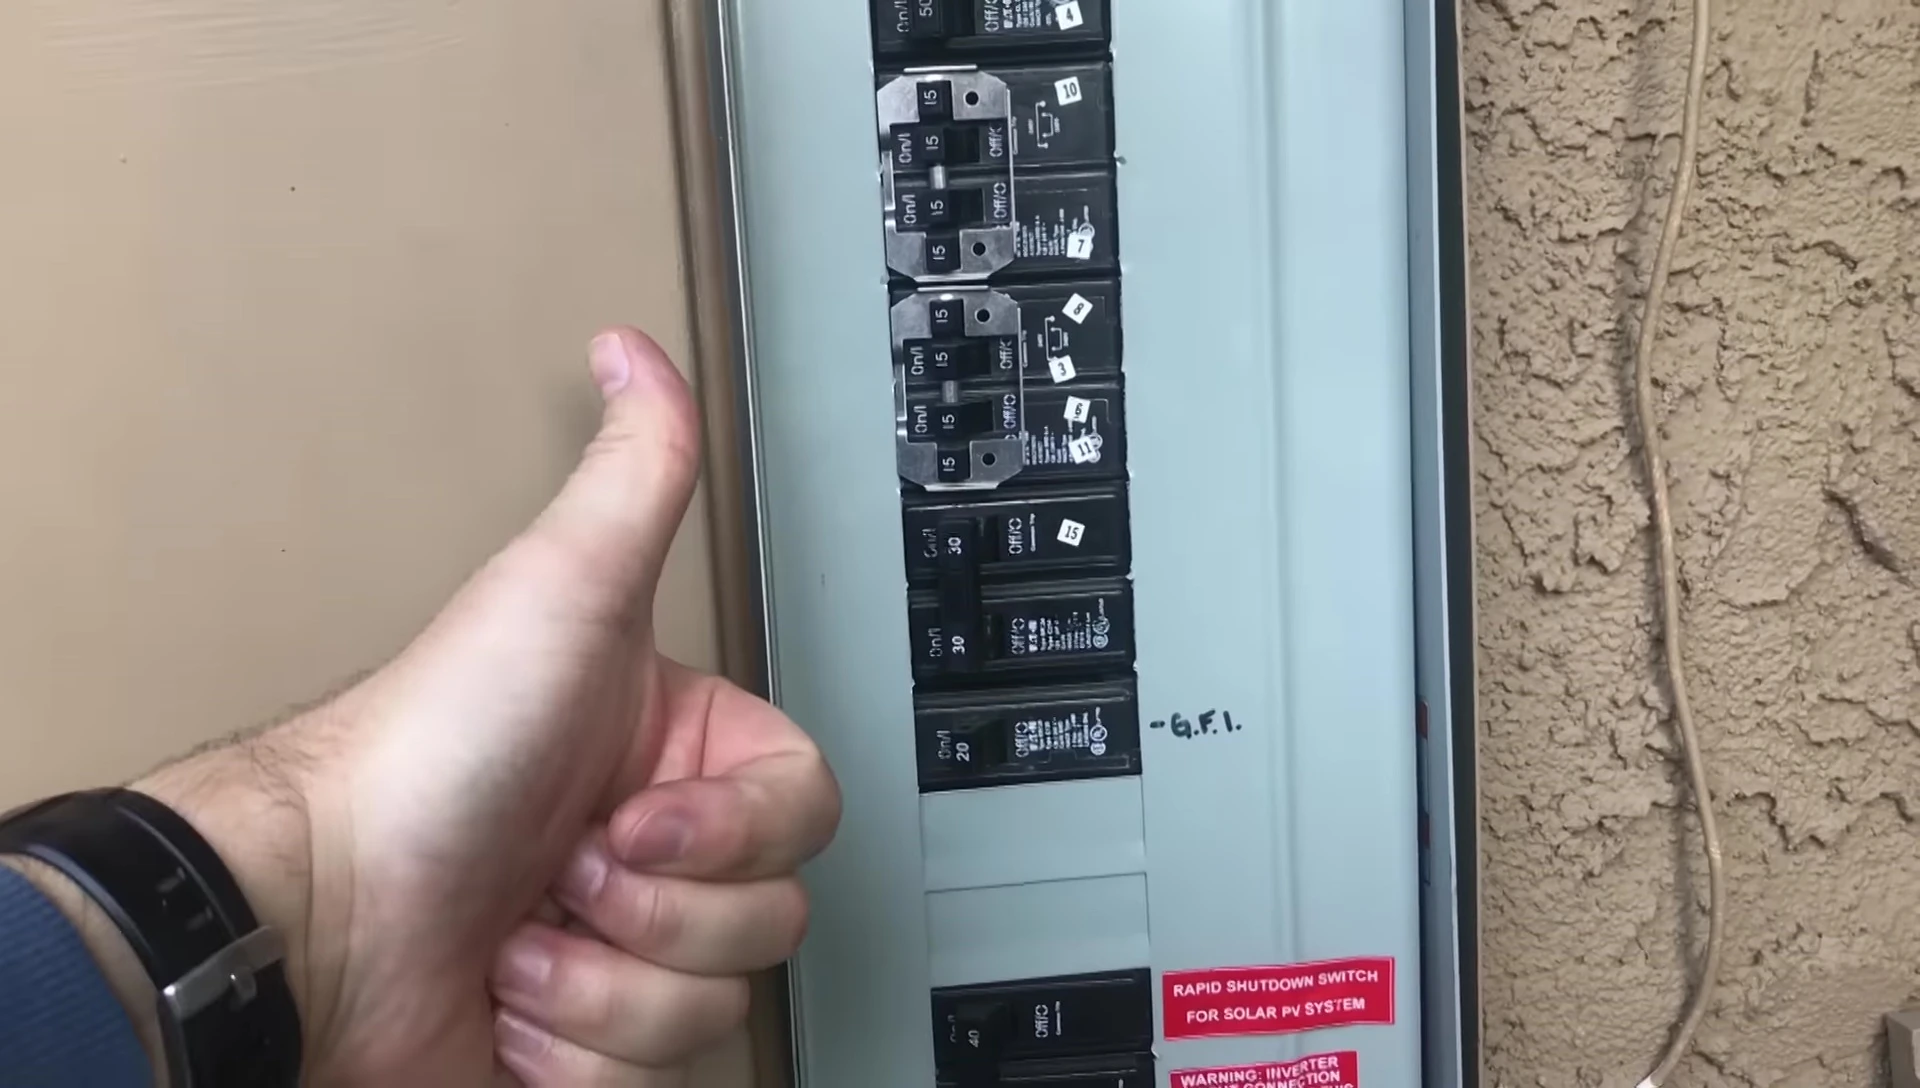
Selecting the right location for your aquarium is crucial. Choose a spot with convenient access to electrical outlets and ensure the circuit can handle the load. Avoid direct sunlight, which can promote algae growth and temperature fluctuations.

The location should also be easily accessible for maintenance, ideally near a utility closet or garage. Avoid placing the tank near vents or heaters that might cause temperature swings. Ensure the chosen surface—table, stand, or floor—can support the tank's substantial weight.
Consider noise levels. The constant hum of equipment might be disruptive in a bedroom. This is a vital point to consider before committing to a specific location for your saltwater tank.

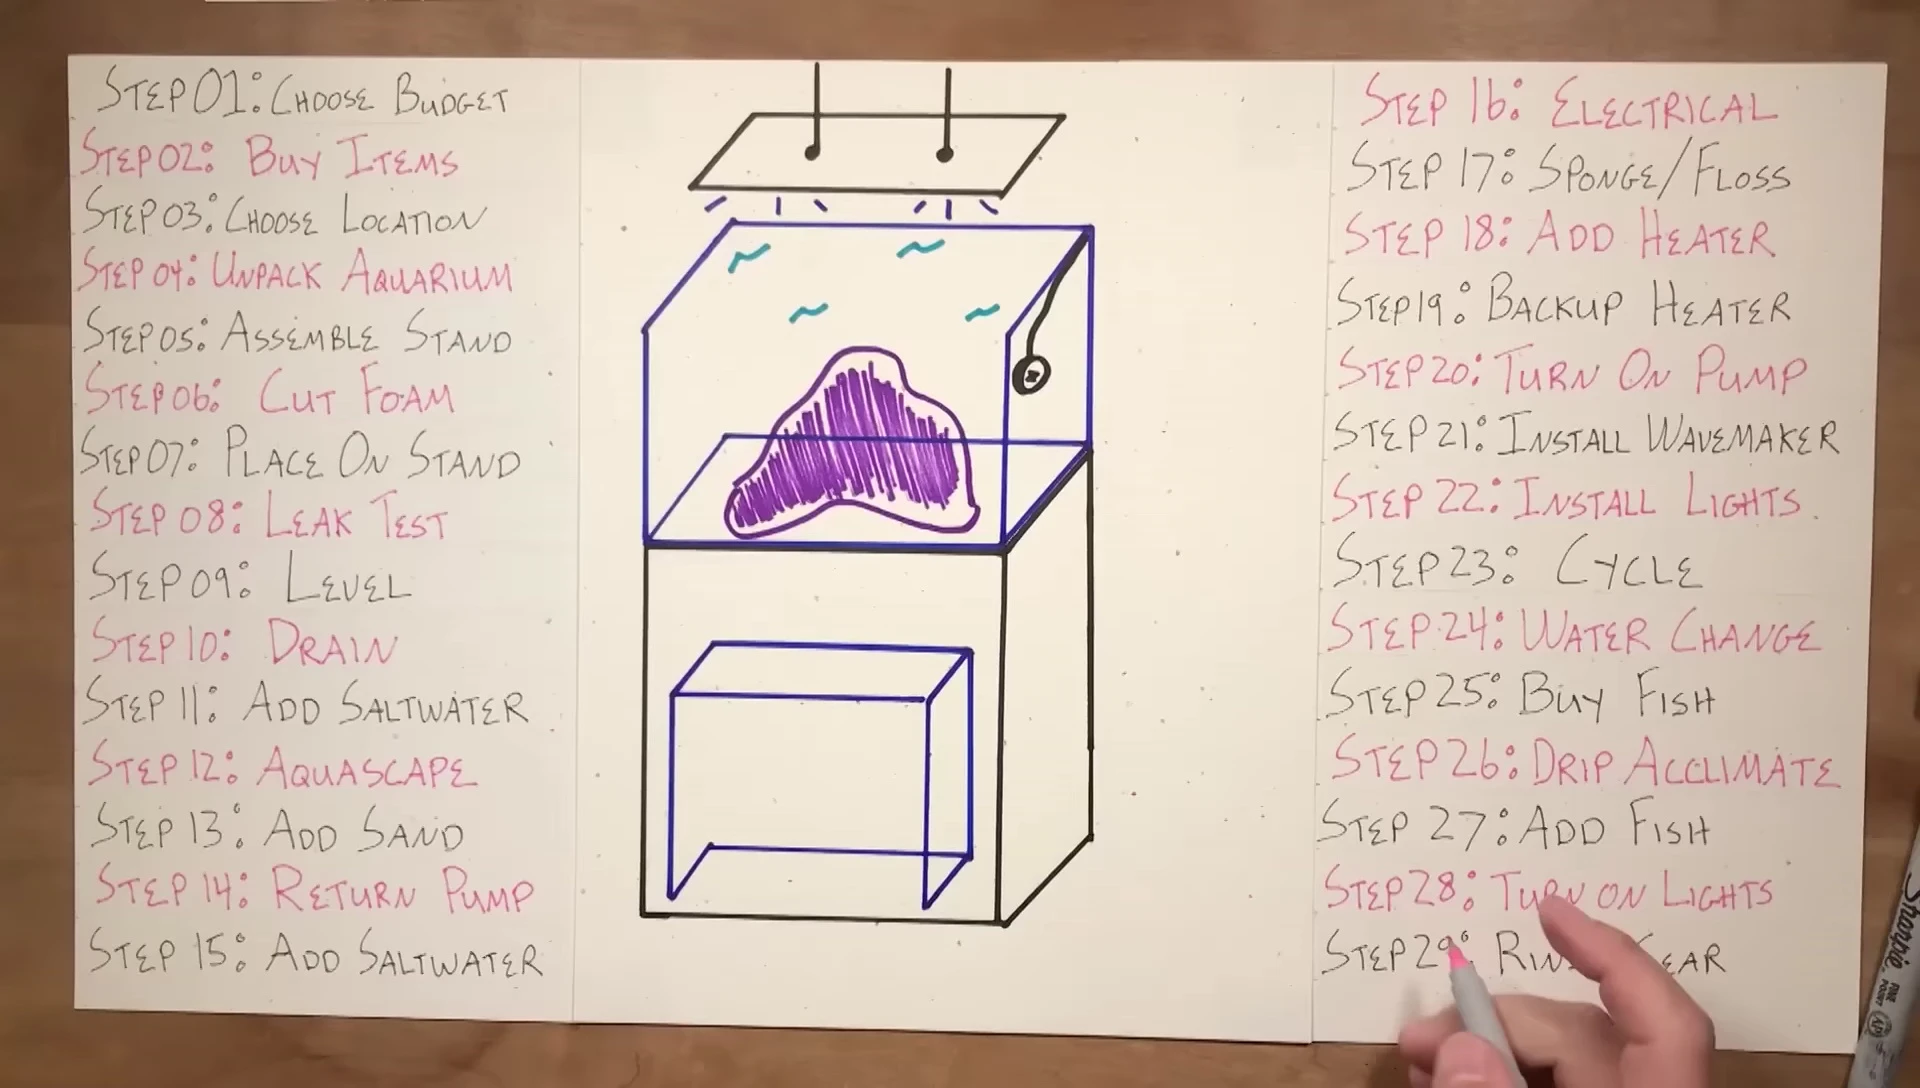
Setting Up the Aquarium
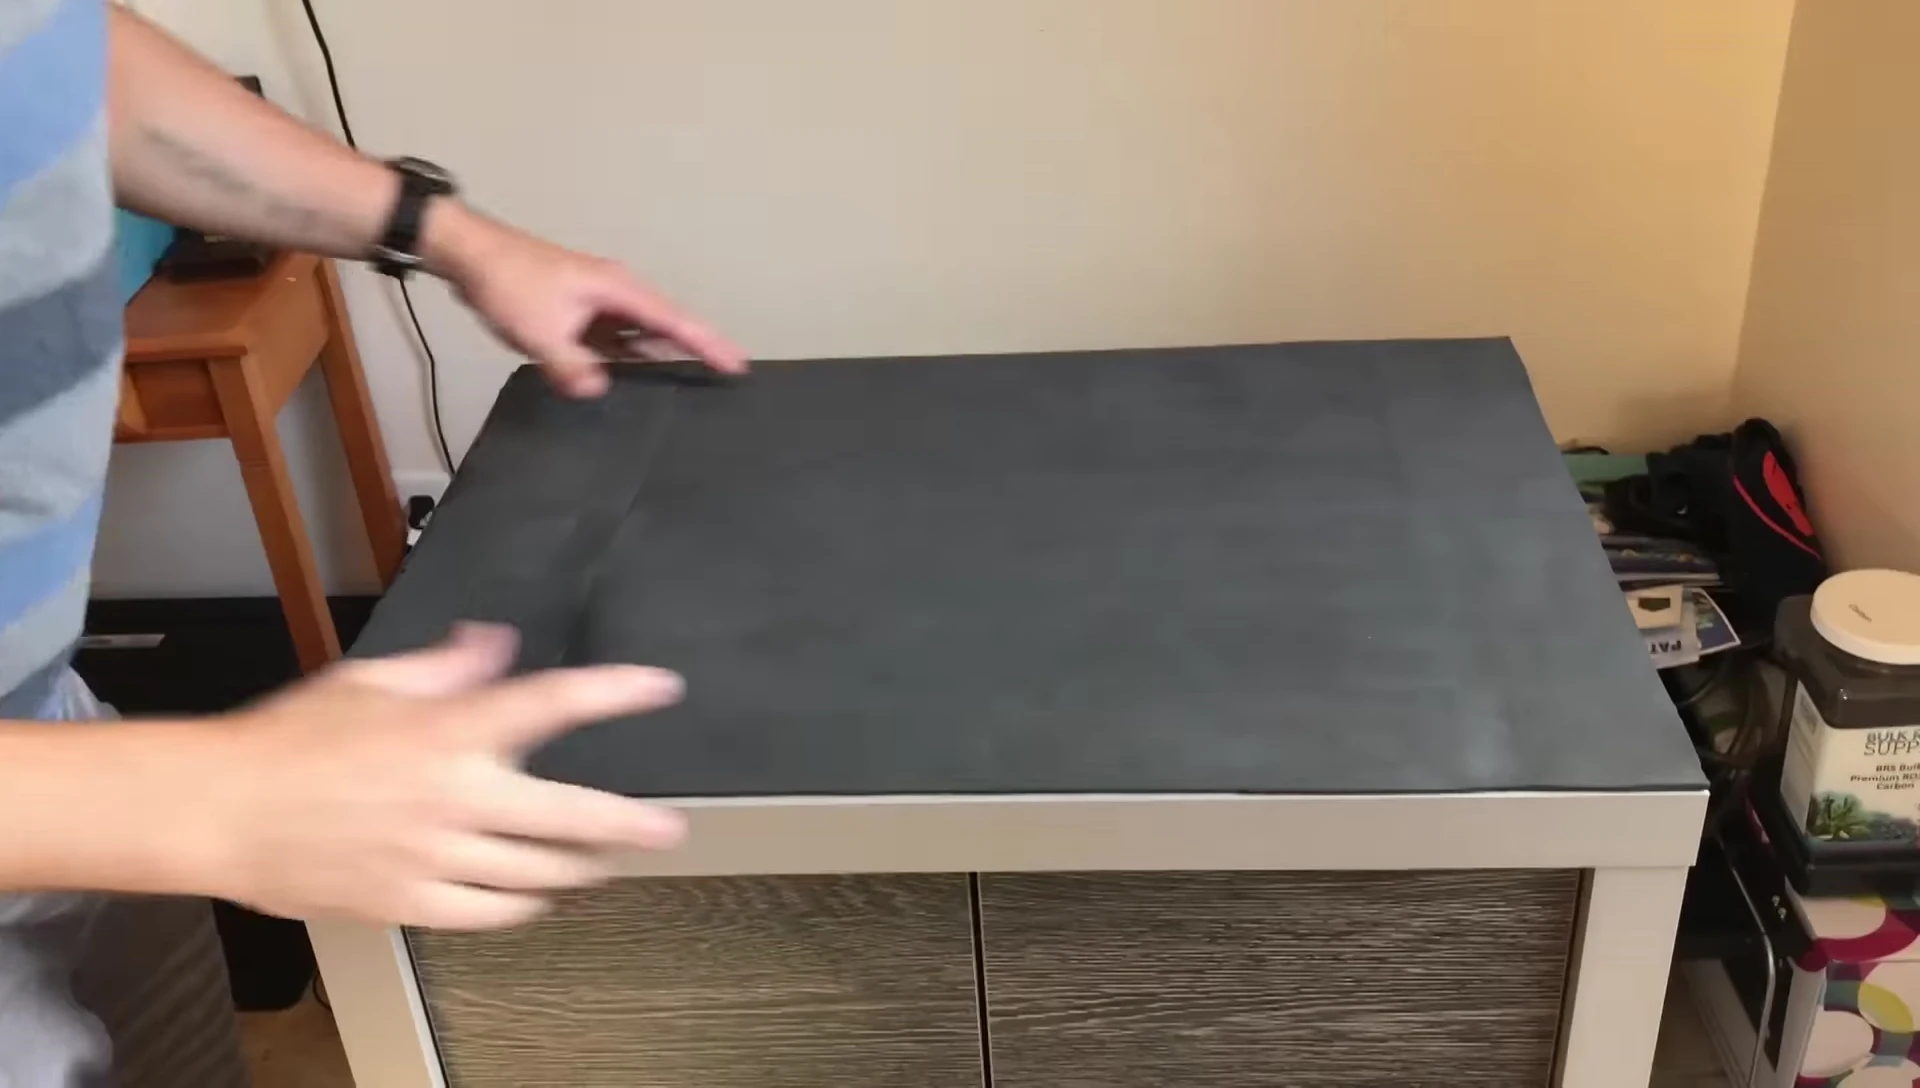
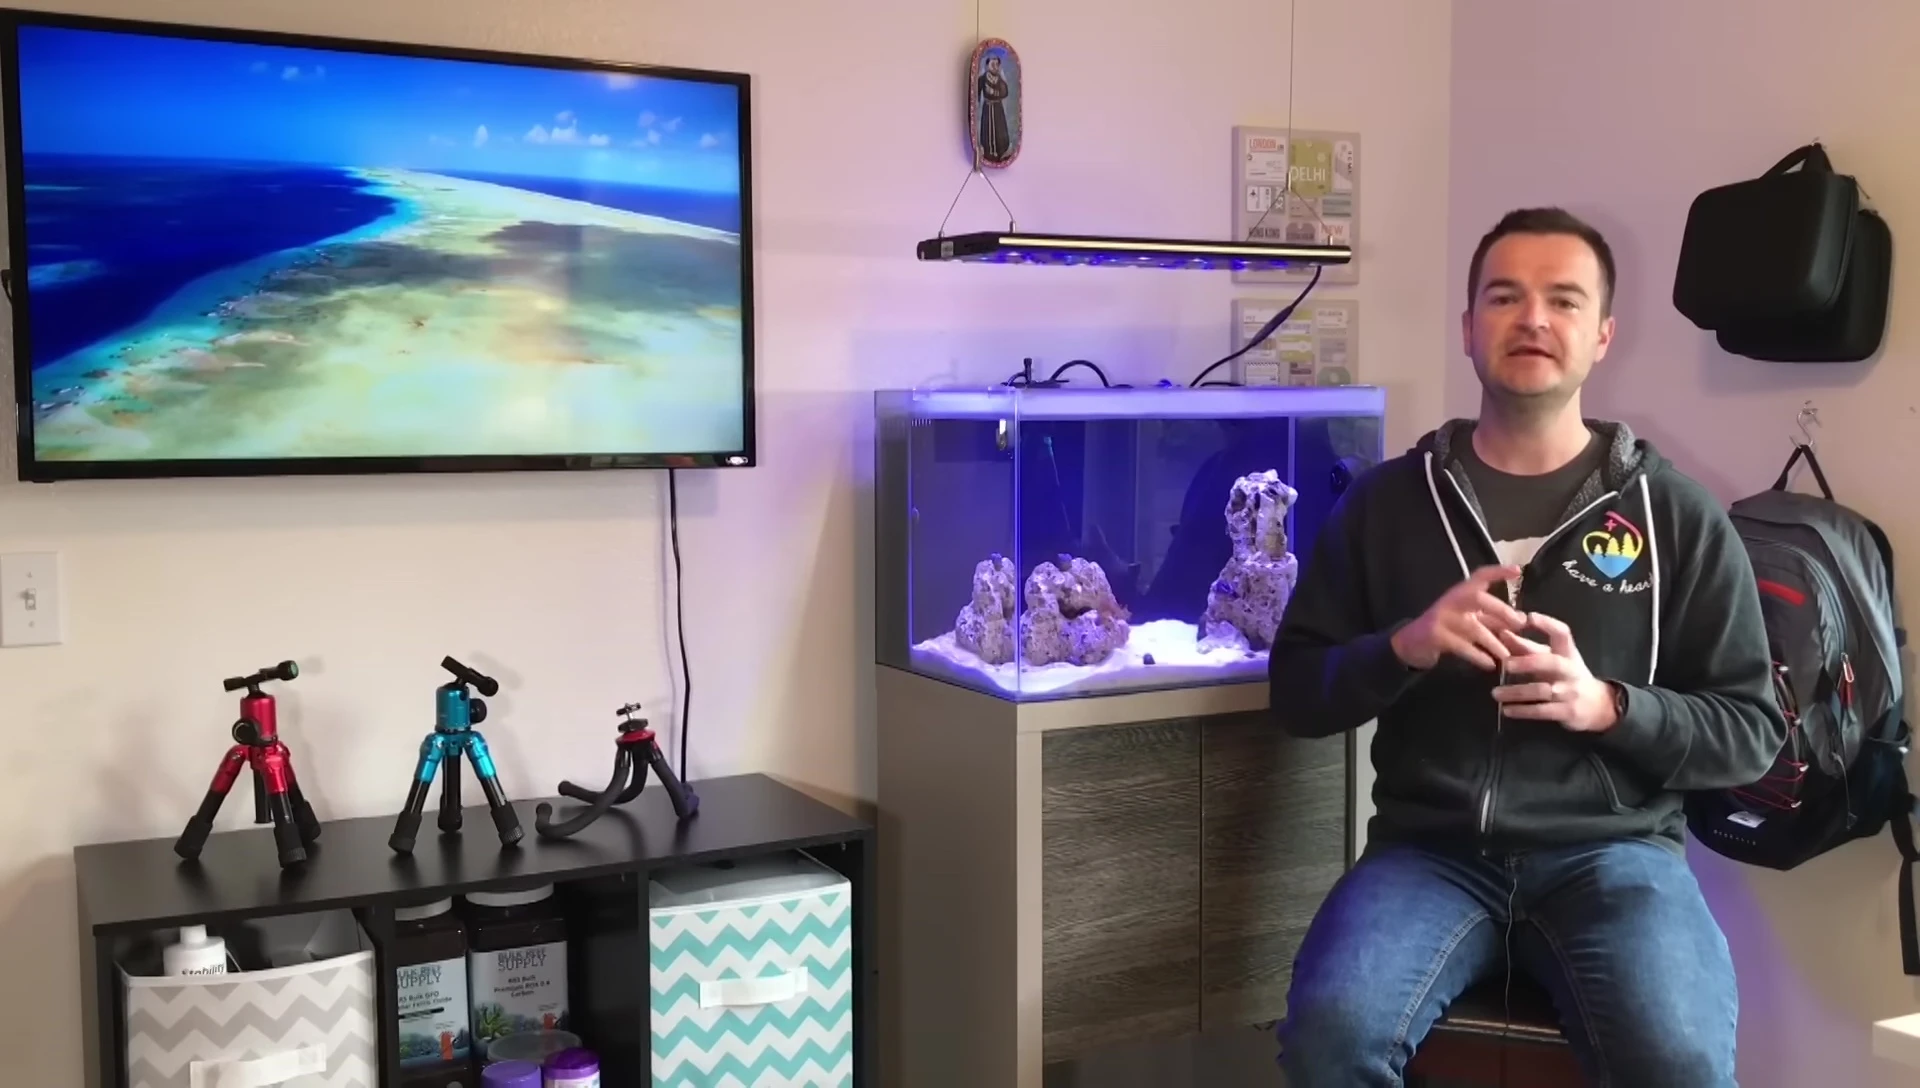
Once your aquarium arrives, inspect it carefully for any damage. Assemble the stand (if purchased separately) following the instructions. Next, cut and place a neoprene foam mat on top of the stand to provide cushioning and protect the tank from scratches.
Carefully place the aquarium onto the stand, ensuring it's level and centered. Use shims to adjust for any uneven surfaces. Leave space between the tank and the wall for easy access during cleaning. If you have a sump, install it according to instructions and conduct a thorough leak test.

Fill the tank with tap water for the initial leak test. Inspect all seams and areas carefully for any leaks. Once you've confirmed no leaks, drain the water. Next, prepare the saltwater; you can buy pre-mixed saltwater, or create your own using RO/DI water and a marine salt mix.
Aquascaping, Filtration, and Equipment Setup
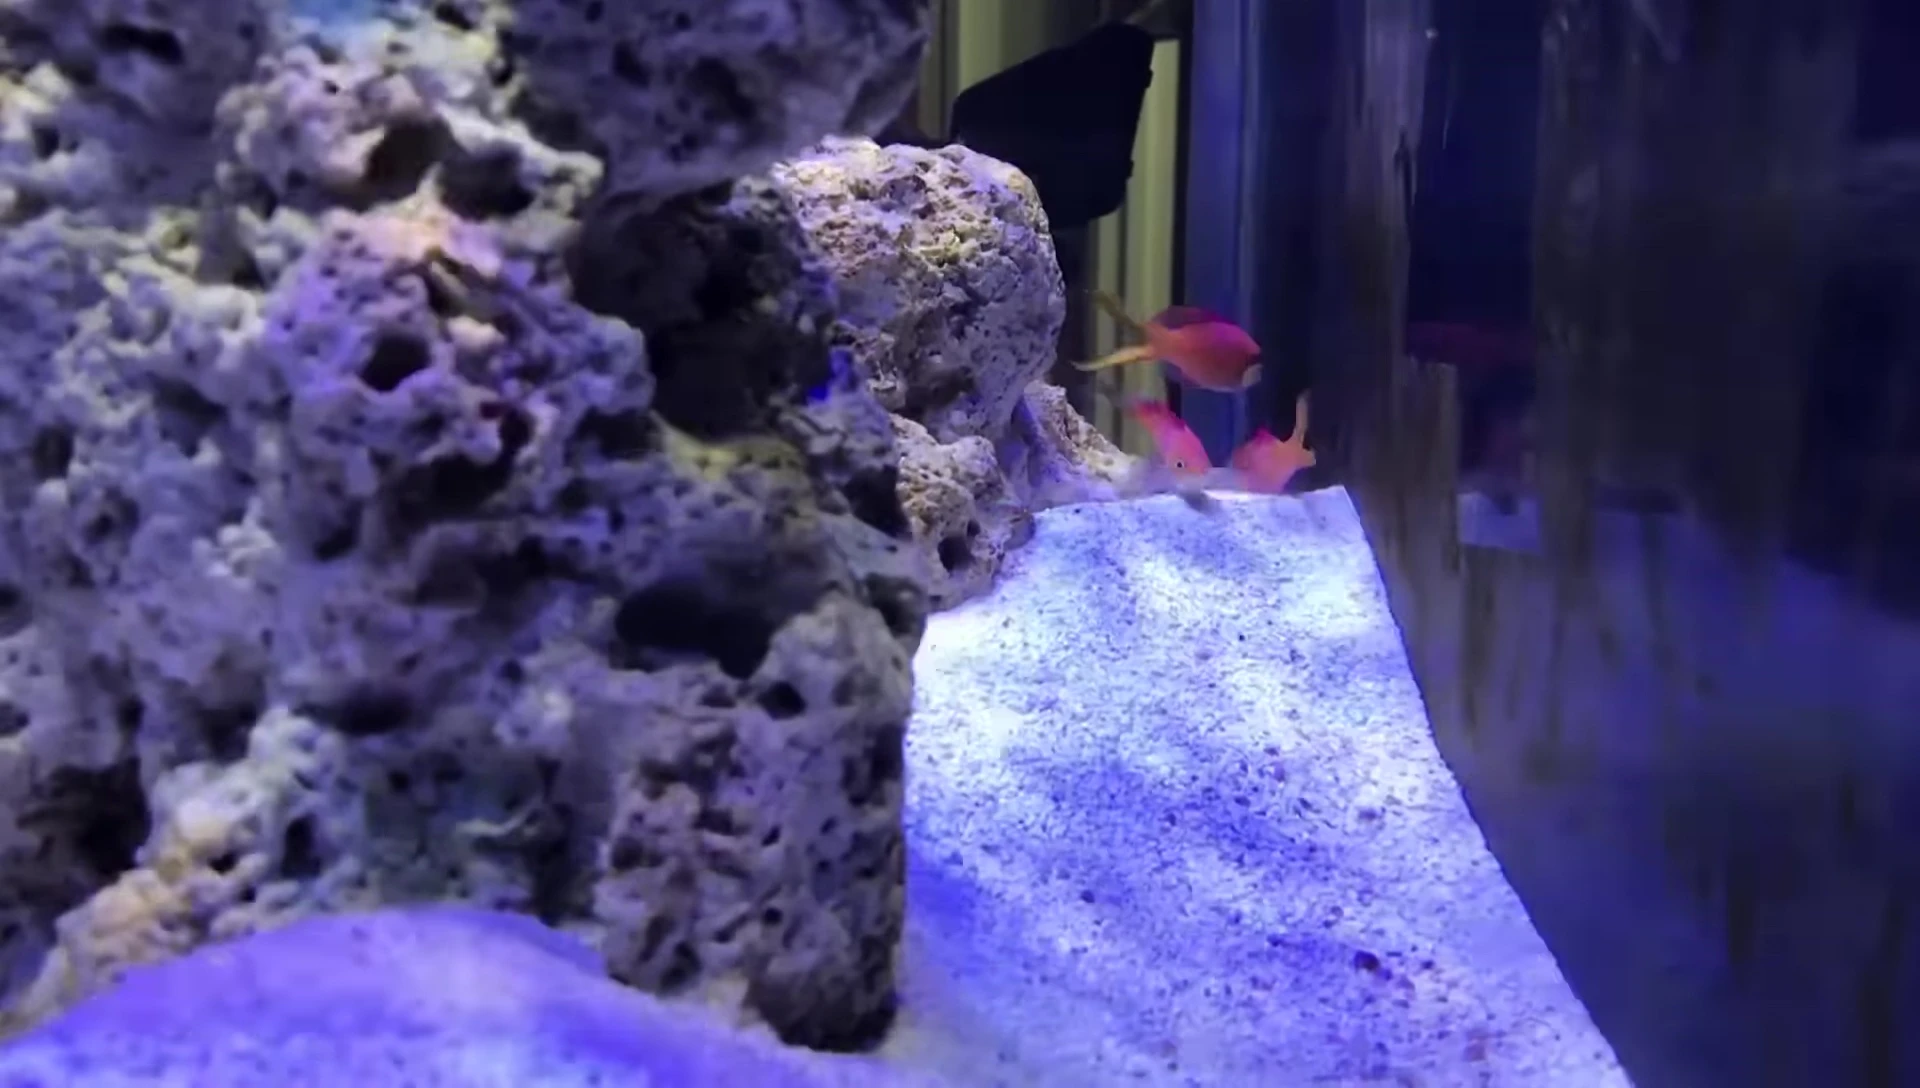
Add live rock and aquascape your tank to your liking, ensuring stability and providing hiding places for fish. Add live sand (optional, but recommended for some species). Then, install the return pump, securing the tubing with plastic hose clamps to prevent rust.

Add the prepared saltwater to the tank slowly, aiming to minimize splashing. Install and organize all wires, ensuring safety measures such as GFCI protection and drip loops are in place. A surge protector with individually controlled outlets simplifies tank maintenance.
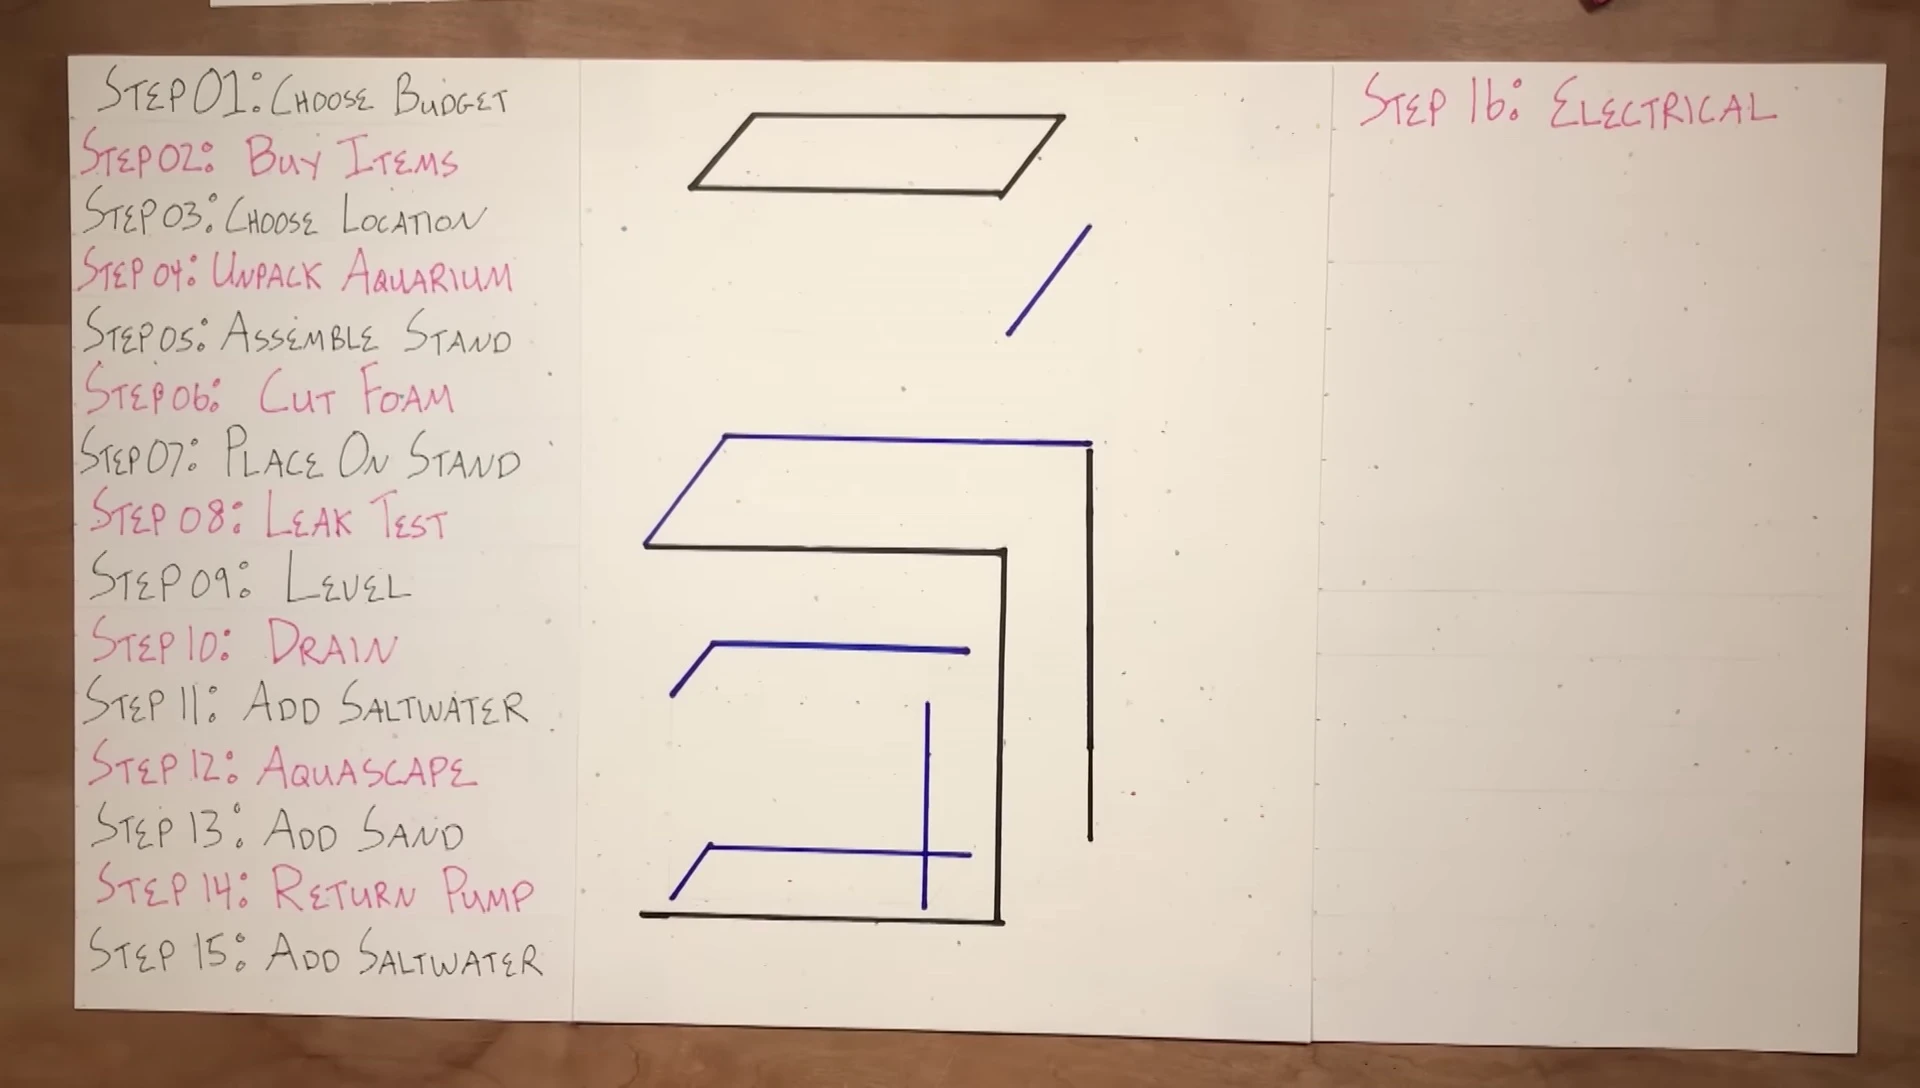
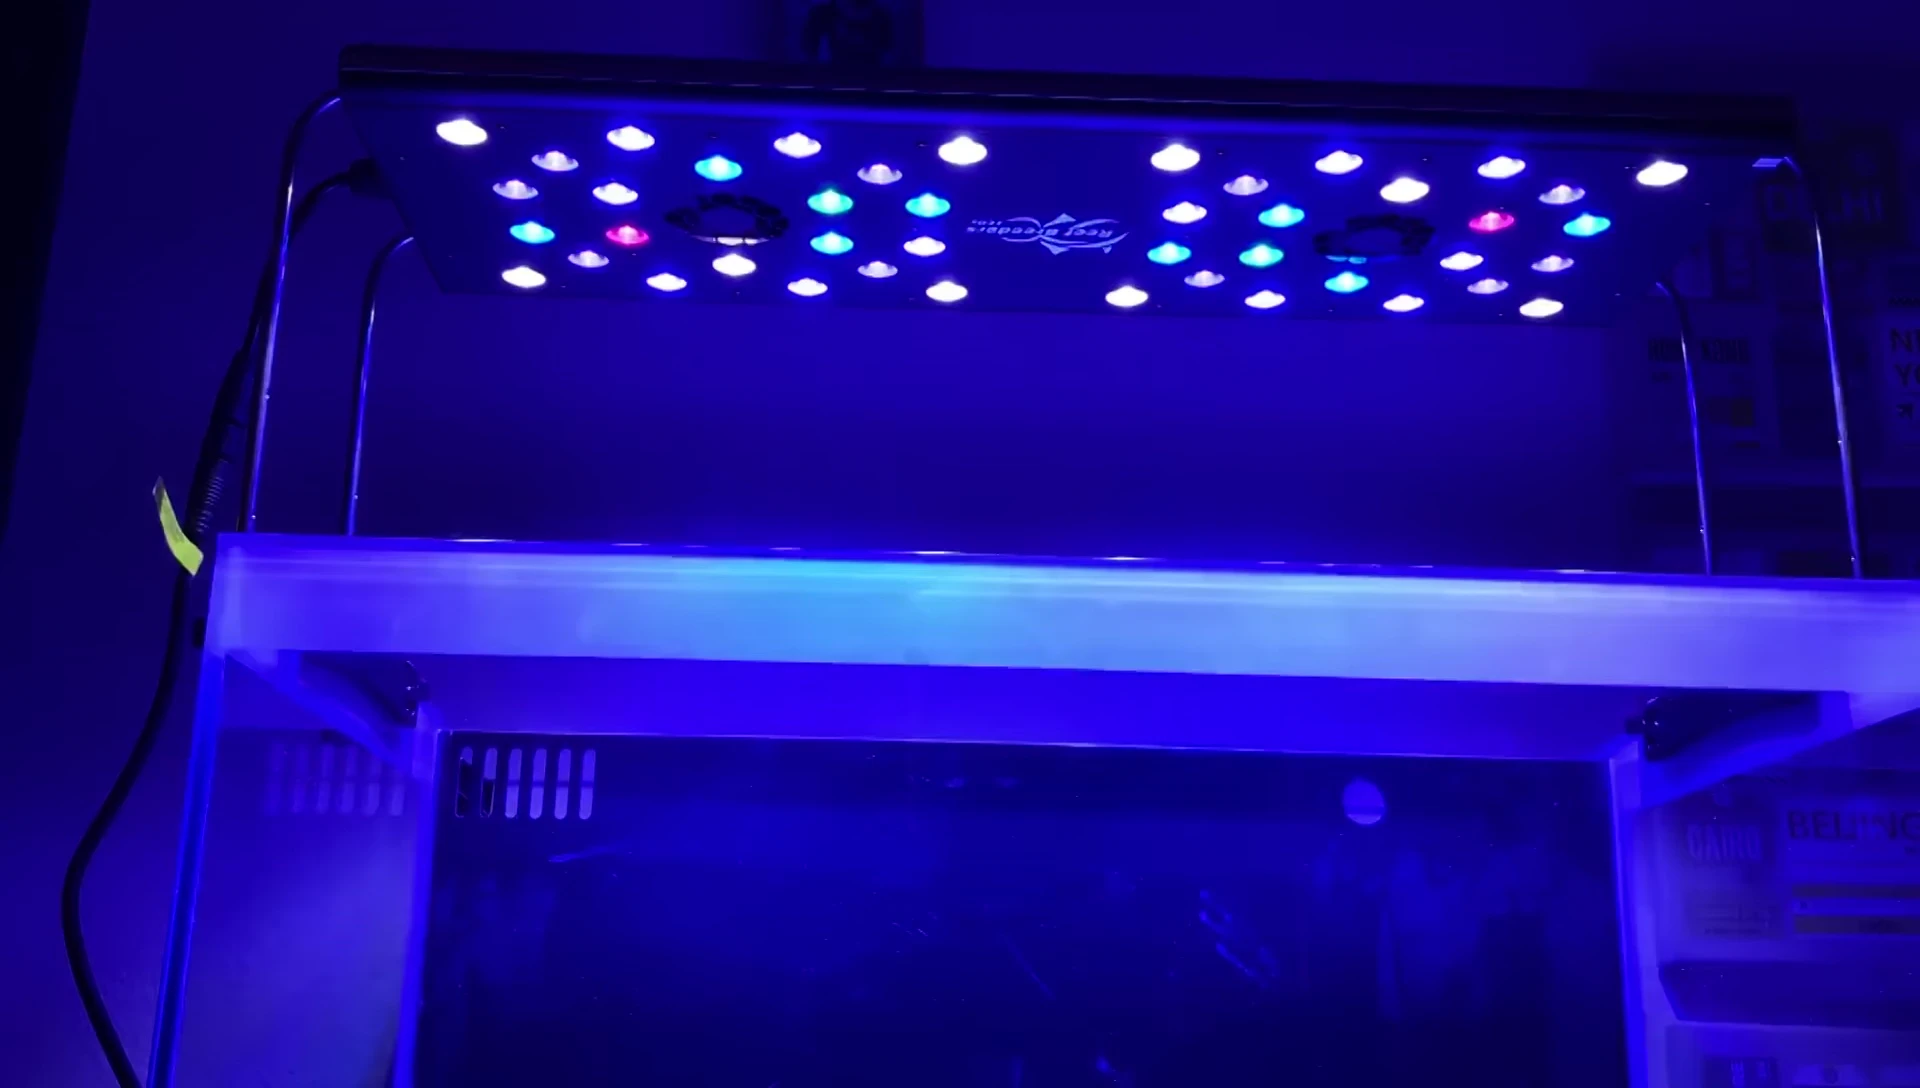
Install the mechanical filter (sponge and/or filter floss), primary heater (in the sump or back chamber), and backup heater (optional, but strongly recommended). Calibrate your heaters to the desired temperature (78°F/25°C).
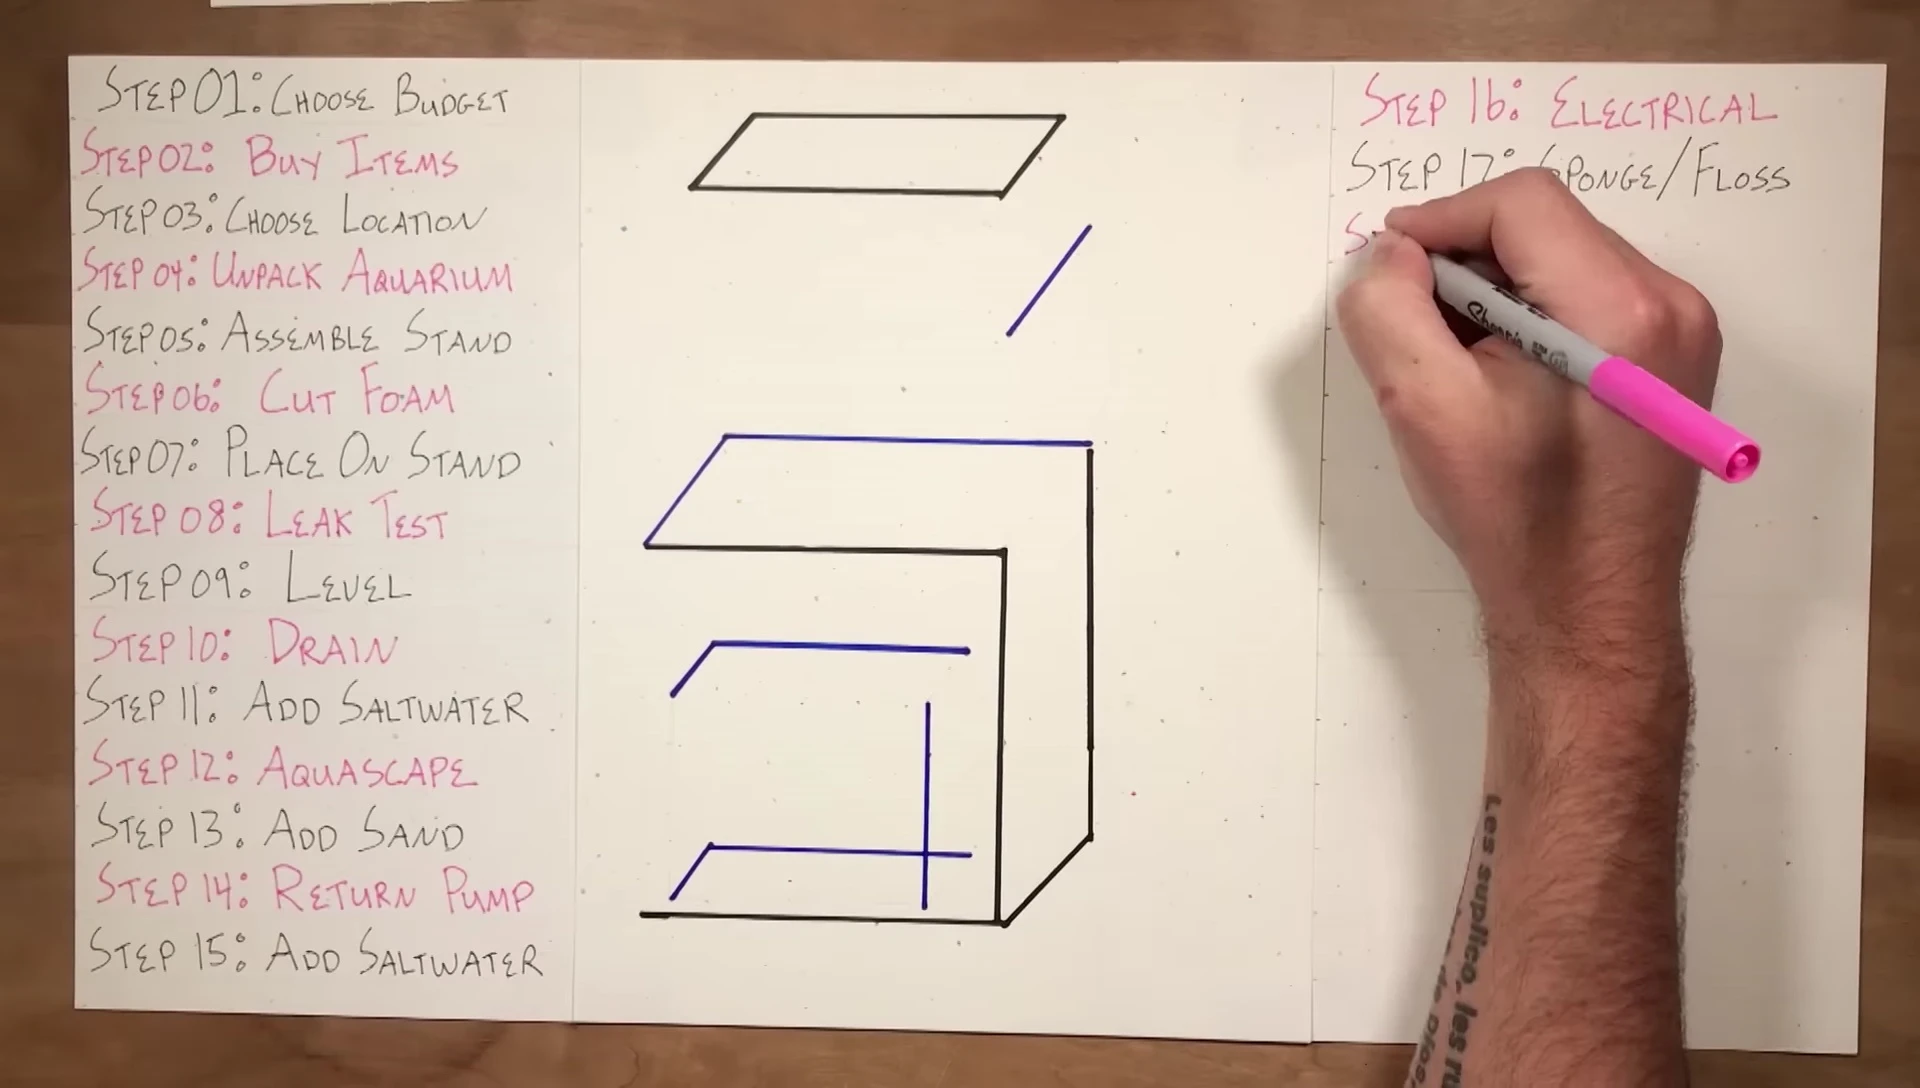
Cycling, Water Changes, and Adding Fish
Cycle the tank to establish beneficial bacteria. You can use the fishless method (with fish food) or the fish method (with hardy fish and beneficial bacteria additives). Monitor ammonia, nitrite, and nitrate levels regularly. Once the cycle is complete (4-6 weeks), perform a 25% water change.
Purchase hardy fish (e.g., clownfish, damsels) and drip acclimate them to your tank over 30 minutes to equalize water parameters. This slow introduction minimizes stress on the fish. Add a mesh screen to prevent jumping.

Turn on the lights a few hours after introducing fish, gradually increasing the intensity if you have programmable lights. Rinse all equipment with fresh water after exposure to saltwater to prevent corrosion and maintain the cleanliness of your aquarium.
Conclusion and Next Steps
Share your new tank's photos and videos with the community! They love seeing the success of fellow hobbyists. If you have any questions, contact them via email at [email protected].
Like this video, subscribe to their YouTube channel, and follow them on Instagram (@myfirstfishtank). Sign up for their newsletter to receive build lists, a buying guide, and access to the members-only section.
This guide is just the beginning of your saltwater aquarium journey. Explore their 10-part series on unboxings, product reviews, and more to delve deeper into the hobby. They're here to support you every step of the way.