Aquarium enthusiasts are constantly seeking ways to improve their setups, balancing efficient filtration with a peaceful environment. The ubiquitous sponge filter, a staple in many aquariums, offers a reliable and biological filtration method, but its inherent bubbling can sometimes be disruptive, especially in smaller tanks or bedrooms. This often leads to compromises – either accepting the noise or sacrificing filtration effectiveness by reducing air flow. Fortunately, a few simple modifications can significantly reduce the noise while simultaneously enhancing the filter's efficiency.
This article will detail a DIY approach to transforming your standard sponge filter into a quieter, more powerful filtration system. We'll guide you through a step-by-step process, illustrating how minor adjustments can make a substantial difference in your aquarium's environment. Get ready to enjoy cleaner water and a more peaceful atmosphere for your aquatic companions!
Preparation and Safety Guidelines
- Sponge filter
- Air tubing
- Check valve
- Air stone
- Scissors
- Always disconnect the filter from the power source before making any modifications or cleaning.
- Avoid using harsh chemicals or abrasive cleaners on the sponge, as this can damage it and contaminate your aquarium water.
- Ensure the modified filter fits securely back into the aquarium and doesn't create any leaks. Proper sealing is crucial to avoid water damage.
Step-by-Step Instructions
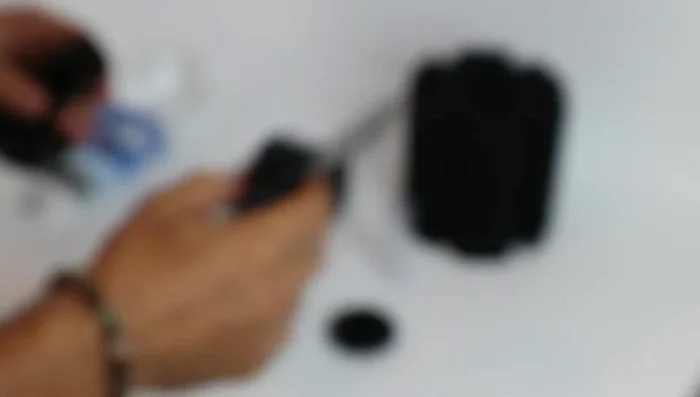
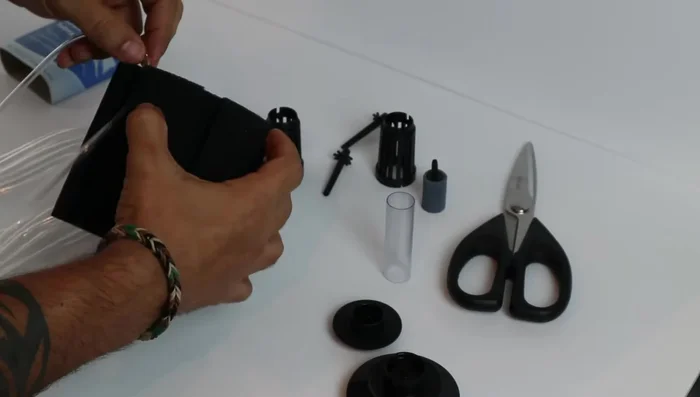
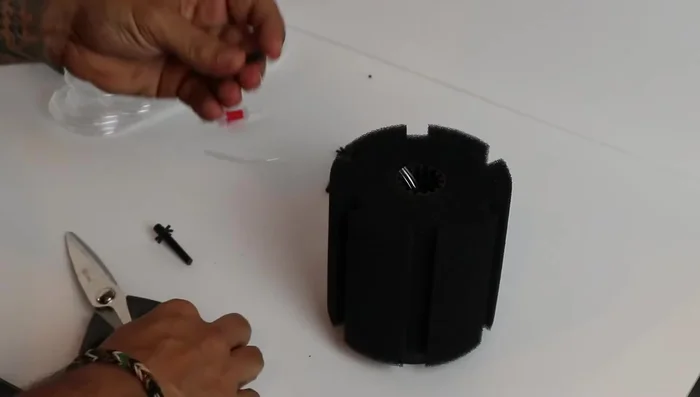
Disassemble Sponge Filter
- Remove the open uplift tube, cap, and sponge. Separate the two columns.

Disassemble Sponge Filter Modify Columns
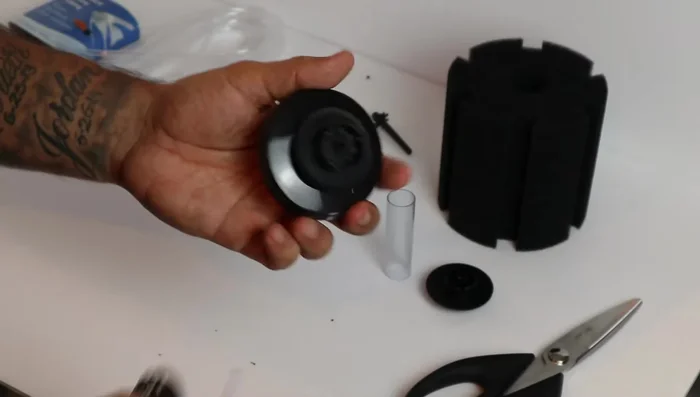
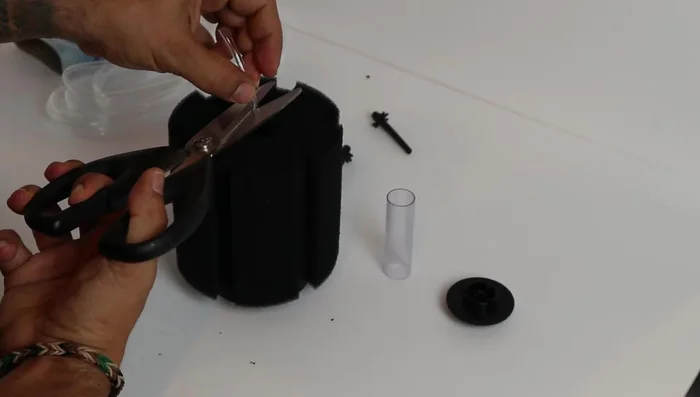
- Cut the spokes inside each column using scissors to allow better airflow for the air stone. Remove the centerpiece but save it for later.
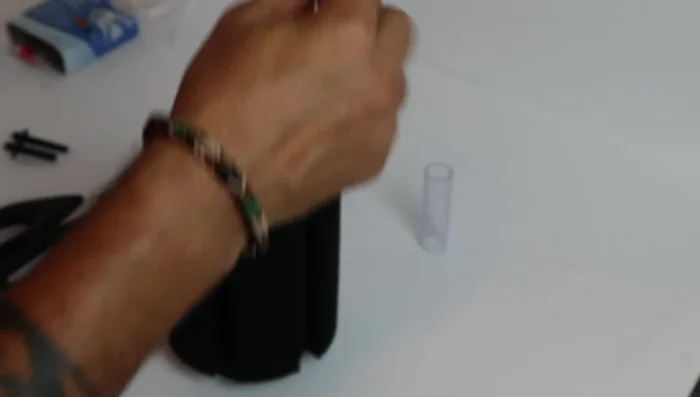
Modify Columns Prepare Air Tubing and Air Stone
- Measure and cut the air tubing. Connect one end to the air stone.
Prepare Air Tubing and Air Stone Install Air Stone
- Insert the air stone into the top of ONE column, ensuring it sits snugly at the bottom. Slide the second column over the tubing and connect it to the bottom column.
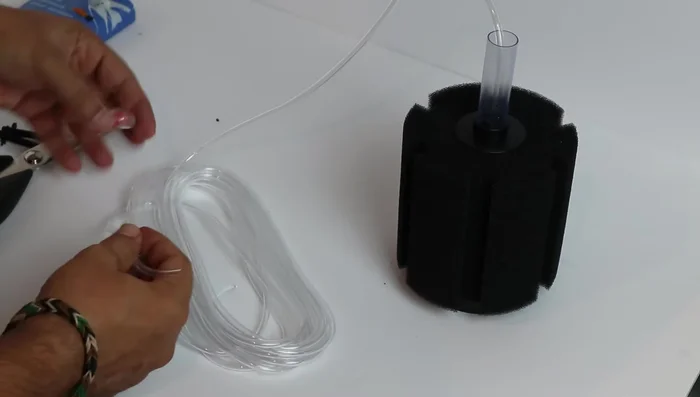
Install Air Stone Assemble Filter Base and Sponge
- Attach the two columns to the base. Re-attach the sponge.
Assemble Filter Base and Sponge Adjust Tubing Length
- Cut the tubing so it is flush with the top of the sponge, adding about 1/4 inch extra.
Adjust Tubing Length Create and Attach Adapter
- Cut about half an inch off the saved centerpiece. Use this as an adapter to connect the tubing to the cap.
- Carefully insert the small adapter piece into the tubing. Reconnect the sponge to the columns.
Create and Attach Adapter Connect Uplift Tube
- Thread the excess tubing through the uplift tube, then connect the tubing to the top of the sponge filter. Slide the uplift tube down and connect it to the sponge filter.
Connect Uplift Tube Install Check Valve
- Install the check valve to prevent backflow if power is lost. (Best placement is where the tubing exits the tank).
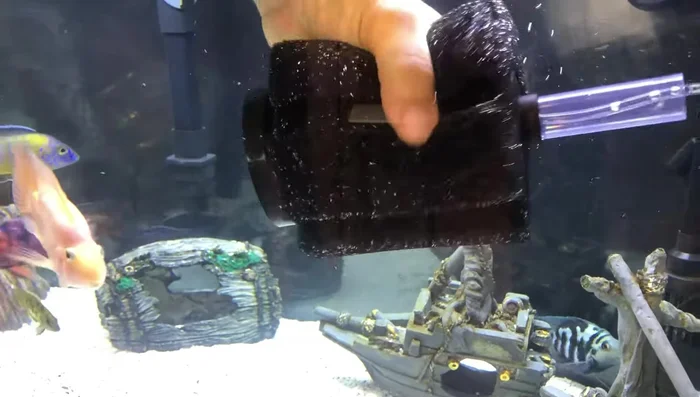
Install Check Valve Final Placement
- Squeeze the sponge to remove air bubbles and place in your aquarium.
Final Placement


Read more: Clean Your Clogged Aquarium Sponge Filter: A Quick & Easy Guide
Tips
- Cutting the spokes improves airflow and reduces noise.
- Separating columns for air stone placement makes it easier to install.
- The centerpiece adapter is crucial for connecting the tubing to the cap.
- The check valve prevents water backflow in case of power loss.
- Squeezing the sponge removes air bubbles for proper submersion.