The allure of a crystal-clear freshwater aquarium, teeming with vibrant life and showcasing pristine water, is undeniable. For many aquarists, achieving and maintaining this level of clarity requires consistent effort and a deep understanding of aquarium maintenance. While regular water changes and diligent filtration are crucial, a significant leap towards achieving that flawless aquatic landscape lies in understanding and utilizing the power of a sump tank. This often-overlooked element offers unparalleled advantages in maintaining water quality, providing essential filtration, and simplifying the overall aquarium management process.
A sump tank acts as a hidden powerhouse, quietly working behind the scenes to keep your aquarium sparkling. Its benefits extend far beyond basic filtration, offering space for larger biological media, improved water chemistry management, and increased overall system stability. In the following steps, we'll explore how to design, install, and maintain a sump tank, transforming your freshwater aquarium into a breathtaking, crystal-clear masterpiece.
Preparation and Safety Guidelines
- Sump tank
- Filter socks
- Heater
- UV Sterilizer
- Activated carbon
- Artificial plants
- Aquarium wood (various types)
- Always ensure proper water level maintenance in both the main tank and the sump to prevent overflows and dry running of pumps. Incorrect water levels can damage equipment and harm your fish.
- Before any maintenance in the sump, disconnect all electrical components (pumps, heaters, etc.) to prevent electric shock. Always handle sharp objects like glass and knives with care.
- Regularly inspect all sump components, including tubing, filters, and pumps, for any signs of wear, tear, or leaks to prevent malfunctions and maintain water quality. Address issues immediately.
Step-by-Step Instructions
Setting up the Sump System
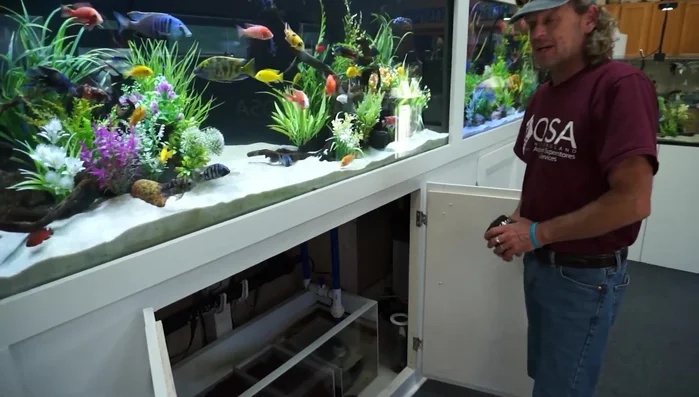
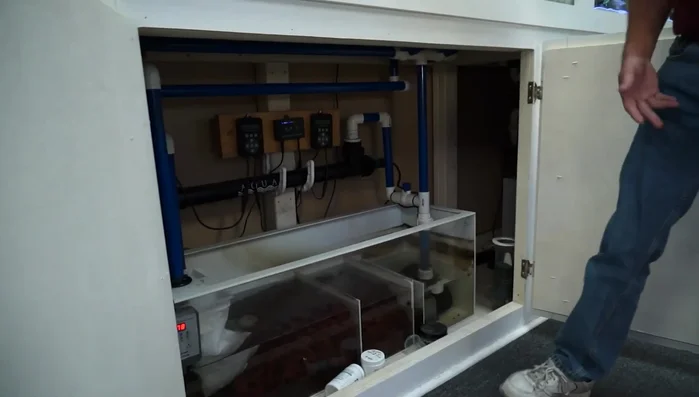
- Setup a sump tank system. This provides superior filtration compared to non-sump tanks.
Establishing Biological Filtration
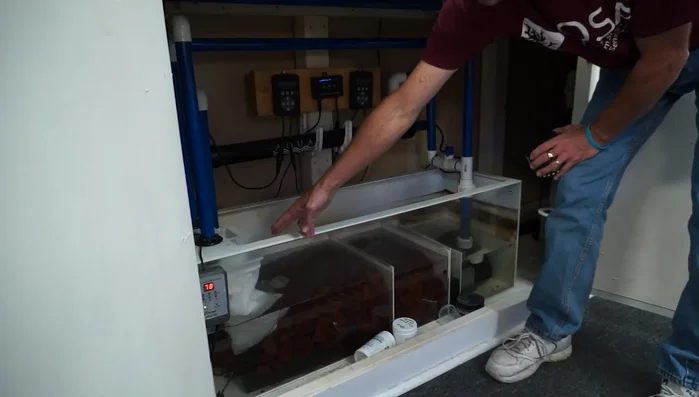
- Utilize biological filtration within the sump. This involves filling the sump with lava rock to support beneficial bacteria growth.

Establishing Biological Filtration Regular Maintenance
- Change filter socks weekly. These catch large debris, significantly reducing maintenance compared to canister filter cleaning.
Regular Maintenance Adding and Replacing Filter Media
- Easily add or replace filter media (e.g., activated carbon) directly into the sump.
Adding and Replacing Filter Media Water Clarity and Algae Control
- Install a powerful UV sterilizer to combat algae growth, especially in sunlit locations. This minimizes the frequency of glass cleaning.
Choosing Aquarium Décor
- Select appropriate décor. Use high-quality artificial plants for low-maintenance, realistic appearance, or incorporate live plants based on the tank's inhabitants and style.
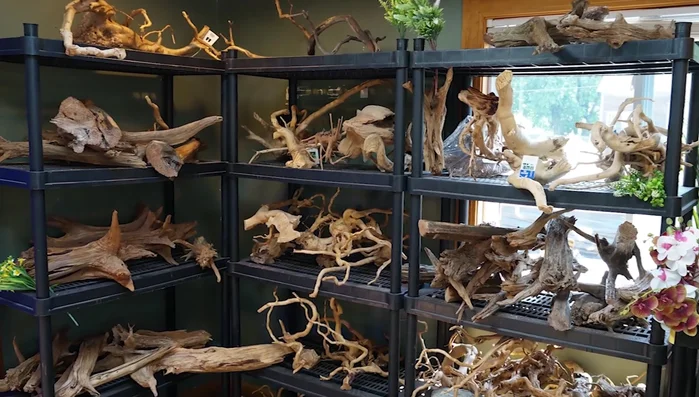
- Choose suitable aquarium wood. A wide selection (spider wood, dragon wood, Malaysian driftwood, etc.) allows for customization of the tank's aesthetic.
Choosing Aquarium Décor
Read more: Top Fake Aquarium Plants: A Comprehensive Guide for Every Tank
Tips
- Hide equipment (heater) within the sump to improve the tank's visual appeal.
- Use high-quality artificial plants for a realistic look and easy maintenance.
- Consider the tank's inhabitants when selecting plants. Live plants are suitable for smaller, community tanks; artificial plants are better for larger, more aggressive fish species.